← All guidesCAMPAIGNS · PERSONAL IMAGES

Every contact gets their own picture.

Add one or more image columns to your spreadsheet. Wassender sends each contact the images in their row as real WhatsApp photos, with your personalized message as the caption of the first one.

01 · PREPARE THE SHEET

Add an image column next to your usual ones.

Keep phone and name, then add image1, image2… as many as you need. Each cell holds either a public image link or a file name such as coupon-mona.jpg. Leave a cell empty when a contact has no image.

  • Links must open the image itself (.jpg, .png or .webp), not a Drive or Dropbox page.
  • You can mix links and file names, even in the same column.
  • Each image can be up to 16 MB; uploads can total 200 MB per campaign.

The Personal images switch in the campaign editor
Turn on Personal images after you write the message
02 · PICK THE COLUMNS

Tick the image columns, in the order to send them.

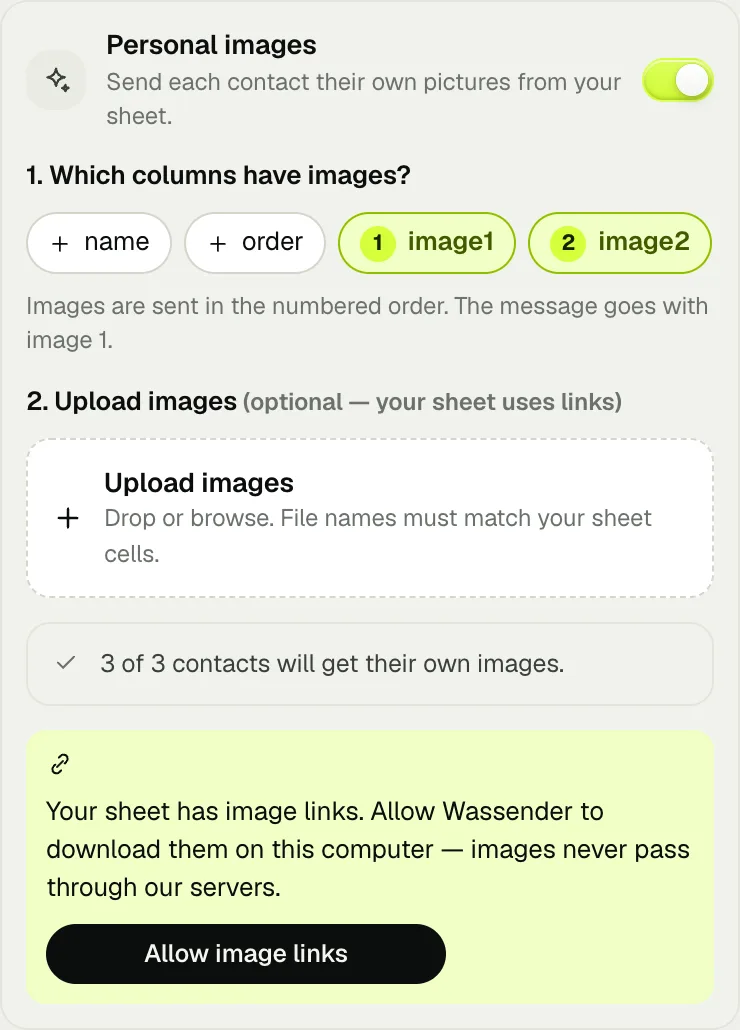
Import the sheet in step 1, write the message, then switch on Personal images. Wassender ticks the columns that look like images; tap a chip to add or remove one. The number on each chip is its sending order, and the message travels with image 1.

  • Links: press Allow image links once and confirm in the small window.
  • Images from links download on your computer; they never pass through our servers.
Image columns chosen from the sheet, with link permission
Columns that hold image links, ready to send
03 · UPLOAD FILES

Drop your images until nothing is missing.

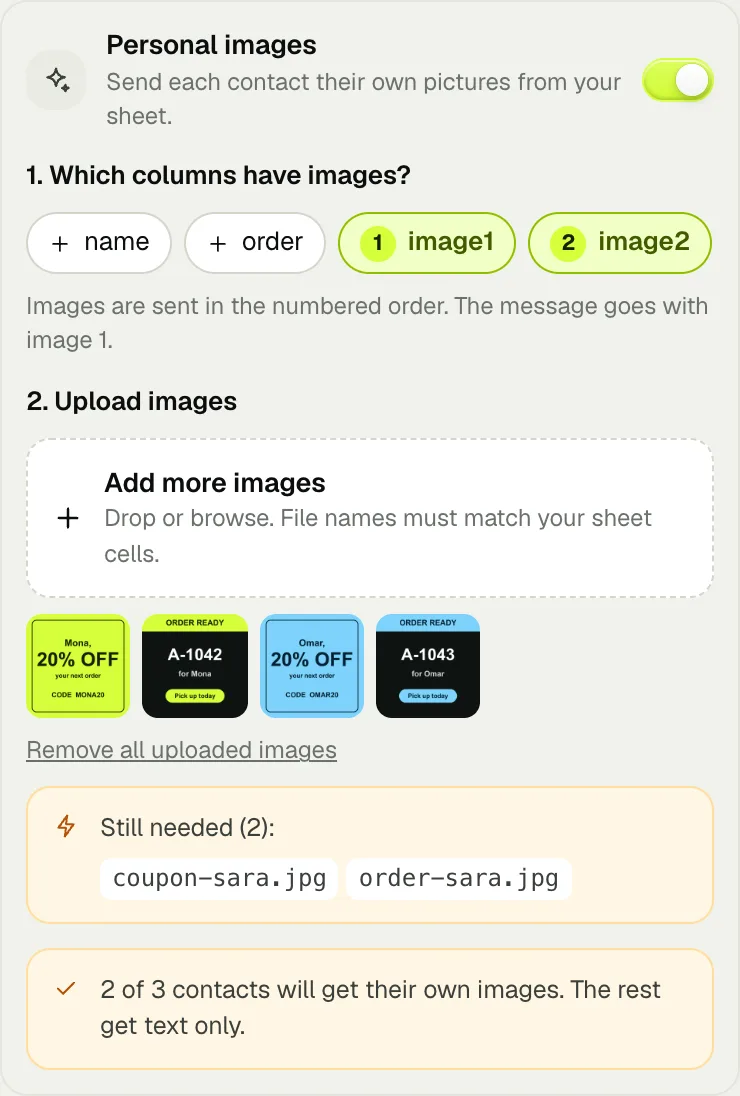
If your cells hold file names, drop the images onto Upload images — many at once is fine. The Still needed list shows exactly which names are missing and shrinks as files match. Upper or lower case doesn't matter, and mona matches mona.jpg.

  • Uploaded images stay in your browser.
  • Uploaded files send fastest: they are ready before the campaign starts.
Upload panel listing the file names still needed
The Still needed list tells you which files to add
04 · PREVIEW AND SEND

See each contact's real picture before you start.

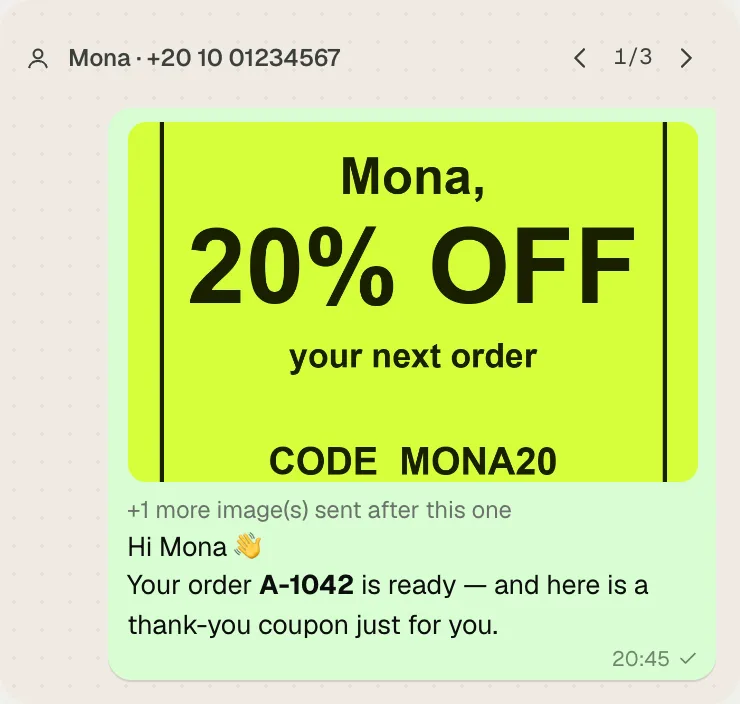
The preview shows each contact's own image with their message; use the arrows to flip through people. The final summary confirms how many contacts have a personal image before you press Start sending.

  • Contacts with no image get your shared attachment, or just the message.
  • If an image fails to load while sending, the message still goes out and the log says so.
Message preview showing a contact's own coupon image
Each preview uses that contact's own image

Ready-to-use messages for common cases

Copy a message, add the image column shown, and you're ready.

Order ready with a product photo — columns: phone, name, order, image1

Hi [name] 👋 Your order *[order]* is ready for pickup. Here's a photo so you know it's yours!

Personal coupon — columns: phone, name, code, image1

Hi [name] 🎁 This coupon is just for you: use code *[code]* on your next visit.

Event ticket or QR pass — columns: phone, name, seat, image1

Hi [name], here's your ticket 🎟️ Seat *[seat]*. Show this QR at the entrance.

Several listing photos — columns: phone, name, area, image1, image2, image3

Hi [name] 🏡 A new listing in *[area]* matches what you asked for. Photos below — want to book a viewing?

If an image doesn't arrive, check this

What you seeLikely causeNext step
A link is marked invalidIt opens a web page, not the imageDownload the image and upload the file instead
A name stays in Still neededSpelling or extension differsRename the file or fix the cell
Fewer contacts have imagesSome cells are emptyThat is fine — they get the message only
Log says image skippedThe link stopped working while sendingFix the link and send to that person again
NEXT GUIDE

Send it at a pace that feels human.

Images take a little longer to send — see how pacing and breaks keep your account safe.

Read the safe sending guide
Chat with us